
File setup 2 min read Updated 10 February 2026
Bleed, safe area and resolution: how to send correct files
Three millimetres that decide between a clean product and white slivers along the edge.
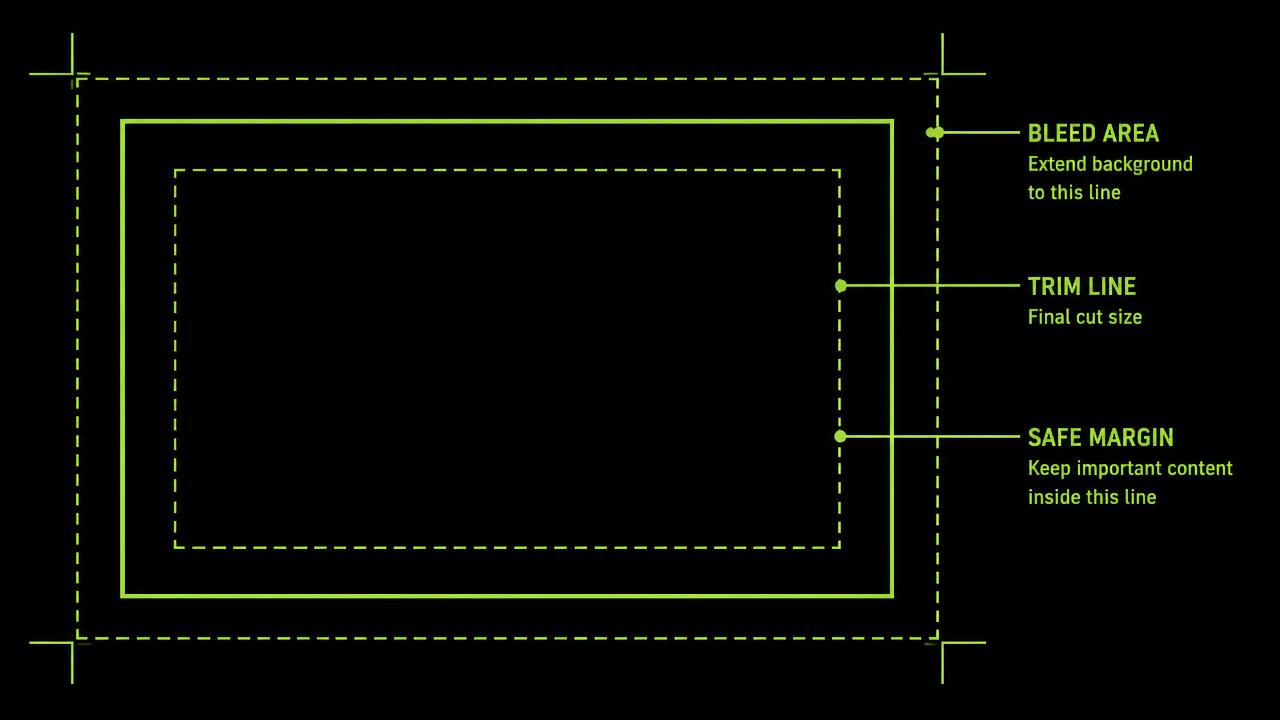
Guillotine cutting has a tolerance of a few tenths of a millimetre, and sheets can shift slightly in the stack. That is why the background must extend past the trim line and text must stay away from it.
| Element | Usual value | What it means |
|---|---|---|
| Bleed, small print | 3 mm on each edge | background extends beyond the trim |
| Bleed, large format | 1 to 5 cm | depends on the tensioning system or hem |
| Safe area | 3 to 5 mm inside | text and logo stay inside this limit |
| Resolution, small print | 300 dpi at final size | flyers, catalogues, business cards |
| Resolution, large format | 100 to 150 dpi | banners and boards viewed from a distance |
| Resolution, billboards | 25 to 50 dpi | viewing distance compensates |
What a production-ready file looks like
- 1PDF in CMYK, with fonts outlined or embedded.
- 2Bleed added on all sides and crop marks enabled.
- 3Images at the right resolution, not upscaled from a phone photo.
- 4One file per product, clearly named, for example flyer-A5-front-back.pdf.
Common mistakes
- A file without bleed, which ends up with a white sliver on one edge.
- A thin border along the product edge, which looks visibly uneven after trimming.
- An image taken from social media and scaled to A3, which comes out pixelated.
- A Word or PowerPoint file sent as the final print file.
Need a recommendation for your project?
Tell us what you want to produce and we will suggest the material, format and timeline.